This post is divided in 2:
- Those techniques developed based on necessity (for lack of equipment) or looking for different approaches in sound. These ideas served their purpose within a context. They might be useful to you in some situations, but not in others, and that’s OK. Try them out, see how they work for you.
- Classic stereo overhead techniques with a boost in the bass drum. Why the boost on the bass drum? Boosting the bass drum is usually the first thing we look for when we have a mic to spare. If you rather place a mic on another instrument—like your snare—in addition to your pair of stereo overheads, go ahead. There’s no rule saying you can’t.
3.1. Bass Drum, Snare And Overhead
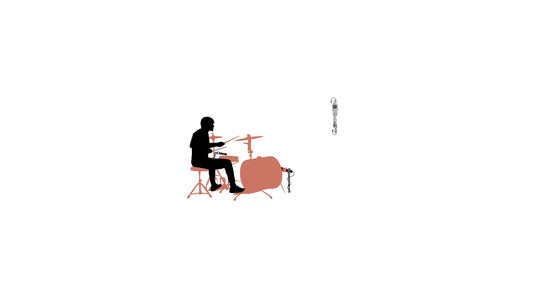
A good place to start. If you have 3 mics, what do you do? One bass drum, one snare, and one room! If you want to get specific about it, the ideal would be:
- A dynamic mic, like a Shure SM57, for the snare.
- A cardioid dynamic microphone, like an AKG D112, or a supercardioid, like a Shure Beta 52A, for the bass drum.
- And maybe a nice room mic, like a Coles 4038 Ribbon Microphone, or any trusty condenser mic.
But any 3 good microphones (either dynamic or condensers) can do the job, as long as you're pointing them in the right direction. Use the pads if you’re using condensers too close to the source. And balance your playing!
You can get very far with only these 3 mics in terms of sound, and it’s a fantastic place to start if you’re on a budget and want to start recording.

- Regarding the snare mic, remember to start at 3 fingers in height from the head and to point the mic to the center of the drum. Adjust angle and height from there.
- For the bass drum, probably start with placing the mic inside—or just outside—the bass drum, in order to avoid a lot of room bleed.
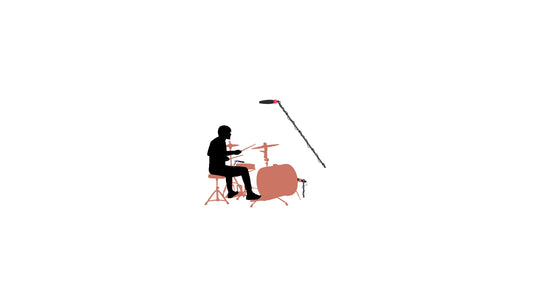
- For the overhead, place it around 2 feet above the cymbals, pointing straight down to the kit. Move it further or closer depending on the sound you’re looking for and make sure you have no phase issues.
Speaking of pointing overhead mics in the right direction, let’s have a brief review of overhead mics.
Adjusting the overhead microphone angle is another tool to get your balance right. You should keep the front of the mics on-axis with the kit as you move them forward or backward. What you want to be “on-axis” depends on what you choose as the focal point for the overheads.
The balance changes as you move the mics from front to back. When your overhead is right over the drum set, moving the mic toward the front of the kit will push it closer to the cymbals and rack tom(s). Pulling it back will pull it closer to the snare, floor tom, and hi-hat. These adjustments move the drums and cymbals in and out of the mics’ polar patterns, so pay attention to how the tone and balance changes when you move them.
When working with this 3-mic technique, try to place your overhead pointing as much as possible at the toms and cymbals—so probably directly above them—since your snare and bass drum are taken care of with their respective mics. What you need is to get a good capture of cymbals, toms and an overall sound. So, try starting at the top with the overhead and go back looking for the sound you want. The further back you go, you’ll tend to capture more drums and less cymbals.
To maintain proper orientation of the mic, you should adjust it as if it was mounted on a track that moves in an arc above the drum kit, to the front and the back.

Pros of this technique:
- It is easy & straightforward. No complications, you pretty much know what to do and what each mic should pick up.
- Good all around sound.
- You’re able to compensate—a bit—your balance. Given that you have bass drum and snare mics, you’re able to boost any of those should you need to, so this setup is a bit more forgiving than a “room-mic-only” technique.
- Mono compatibility. Don’t overcomplicate things. Keep everything in the middle and focus on the sound. You get 3 signals, get the best sound possible out of them.
Cons:
- Not stereo. If you have everything in the middle with 3 mics picking up different instruments of your set, then your chances to do a stereo mix with this are slim to none.
3.2. Bass Drum, Snare And Guitar
This technique is somewhat experimental, in the end, that’s the reason we’re creating this guide, so take it for what it is.
Place an acoustic guitar on a stand around 2 feet in front of your drum set. Preferably with the guitar’s opening looking away from the drums. Place a condenser microphone pointing at the guitar's sound hole. The sound of the drums will reverberate inside the guitar’s body and be picked up by the condenser. A lot of reverb, maybe some echo. A fun experiment.
Then place your snare mic 3 fingers from the top drumhead, pointing at the center.
Regarding the bass drum, it would be a good idea to place it inside the bass drum. You really don’t want a lot of room sound with this technique, given that the guitar will have a lot of reverb. Want to hear how a microphone pointing at the guitar's sound hole sounds? Check out this video.

As mentioned above, this technique was made to experiment, so experiment when you’re mixing it as well. Maybe try a “boomy” mix—with lots of reverb and echoes—which will come from the microphone placed in the guitar, and add clarity and punch by mixing in the bass drum and snare mics.
Pros of this technique:
- Simple and straightforward to set up. Which is also a great thing given how uncommon this approach is. You can tell pretty quickly if this is something that serves you or not.
- Mono compatibility. As with the previous technique, don’t overcomplicate it. Keep everything in the middle and focus on the sound. You get 3 signals, get the best sound possible out of them.
Cons:
- The sound coming out of the guitar mic might be too ringy, reverberated and uncontrolled. Yes, we know.
- This technique might not be suitable for busy drumming. The reverberations and echoes with a lot of notes can create quite a cacophony.
- Not a lot of cymbals in this approach.
3.3. The Triangle (Two Up-Front And Overhead)
This technique is an extension of the “Two Up-Front Technique” explained in other post. The idea behind this approach is to have the 2 condensers in front of the kit—as previously described—and adding a 3rd condenser as an overhead. So, it would look something like:
- Condenser front left.
- Condenser front right.
- Overhead condenser in the middle.

As with the Two Up-Front approach, the idea of having 2 condensers in front of the kit lies in the ability to capture the bass drum by both of them, while capturing a nice stereo-image of the drumset. Now, by adding a centered overhead, you also gain an overall mono signal, which certainly helps in many ways:
- You now have a centered signal, which can help you “anchor” the sound, in addition to the left and right signals from the other 2 condensers.
- The cymbals and toms will be clearer.
- Added “snap” to the snare.
- All of the above will certainly help to create a more rounded sound of the drums.
Pros of this technique:
- More well-rounded sound, with a stereo image and a centered mono overhead signal which complement each other.
- Clearer sound from cymbals and toms.
- The bass drum is still the anchor of this sound, remaining pretty much in the center of all mics, which allows you to go harder in the stereo if you wish to do so.
Cons:
- A more “roomy” sound, which depending on what you’re looking for, can be a pro or a con.
- No closeups, no boosts, just an overall sound of the drums.
- More difficult to compensate for the lack of balance in your playing. If you go too hard on the cymbals, then it will be very difficult to fix it.
- As with the “Two up-front”, the bass drum might be on the dryer side of the sound spectrum. Since no microphone is placed in the middle of the drum’s sound projection (either inside or right outside the bass drum), the result is usually a dryer sound. You’ll probably need to EQ it a bit in your DAW.
3.4. Eric Valentine’s Method
Story time:
Eric Valentine is famous for—among other records—being the producer, engineer and mixer for 2002’s Queens of the Stone Age “Songs for the Deaf”, featuring Dave Grohl on drums and—arguably—getting one of the best drum sounds ever. If you want to check out how that drum sound was achieved in its entirety, you can check it out here.Eric’s approach to miking drums for this session (as well as others since then) was to, instead of having individual mics for each instrument in the drum set, have microphones for “sections” of the drum set: left, right and front-center of the kit. Here’s a YouTube video of Eric explaining his approach (and that of the entire record, not only drums). With that, he gets the entire drumset with a very good initial stereo image. Of course, more mics were used in the session—although, not a lot more—we’ll get to that later in this guide or you can check out the links in this paragraph.
Let’s explore Valentine’s first building block of this drum sound: the 3 room mics.

Side story:
Valentine uses a two-up-front technique (with additional mics, of course) in Persephone's Bees’ album “Notes from The Underworld." In this case he uses 2 Coles 4038 Ribbon Microphones, just like Eric Sarafin in the original “Recorderman” technique. If you want to know more about that, you can check it out here.
Back to Valentine’s 3-mic technique, here’s the outline:
- Place each mic (left, center and right) equidistant from each other.
- Place them around 3 feet off the floor. You don’t want to place them too high, otherwise you’ll lose a lot of low-end.
- Make sure you’re pointing them towards their corresponding section of the drum set.
Pros of this approach:
- A holistic sound of the drums, with great stereo image possibilities with the left & right mics, but a centered mono signal with the center-front.
- Better bass drum than two-up-front or triangle techniques—although probably not ideal, since the mic will be higher than the bass drum’s source of sound projection.
- If your drums sing, this approach will sing too.
Cons:
- You depend a lot on the room. Dry room, dry sound.
- Dry bass drum and the snare blends with the rest of the kit.
- Your balance determines the final sound. This approach by itself can be very unforgiving. Valentine states of Dave Grohl: “Because Grohl hits so consistently, it is much easier to accommodate the really hard playing. I have heard people speculate that there are samples layered in with the drum recording. There are definitely no samples. Grohl just plays with inhuman consistency."
3.5. Stereo Overheads And Bass Drum
As mentioned at the opening of this post, we won’t go into detail on how to set up the overheads, since we already went through that in another post. If you didn't read this chapter's opening, you might be asking: Why boost the bass drum? Boosting the bass drum is usually the first thing we look for when we have a mic to spare. If you rather place a mic on another instrument—like your snare—in addition to your pair of stereo overheads, go ahead. There’s no rule saying you can’t.
Since we already went through all the stereo overhead techniques (Recording With 2 Microphones) and bass drum miking setups, we’ll provide a simple explanation and setup graphics.
3.5.1. X-Y And Bass Drum
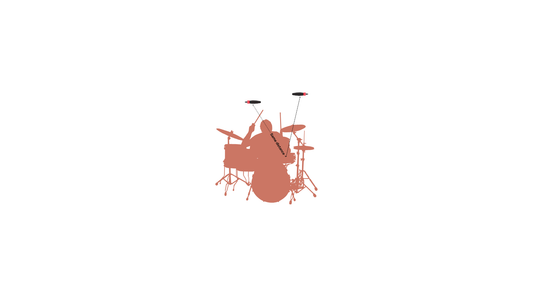
Set up your stereo overheads in an X-Y configuration and place a microphone inside the bass drum (or just outside), to avoid additional bleeding.

3.5.2. ORTF And Bass Drum

3.5.3. Wide Stereo Overheads/NOS And Bass Drum

3.5.4. Spaced Pair (Or AB) And Bass Drum

3.5.5. Mid-Side Technique And Bass Drum

3.5.6. The Blumlein Pair And Bass Drum


