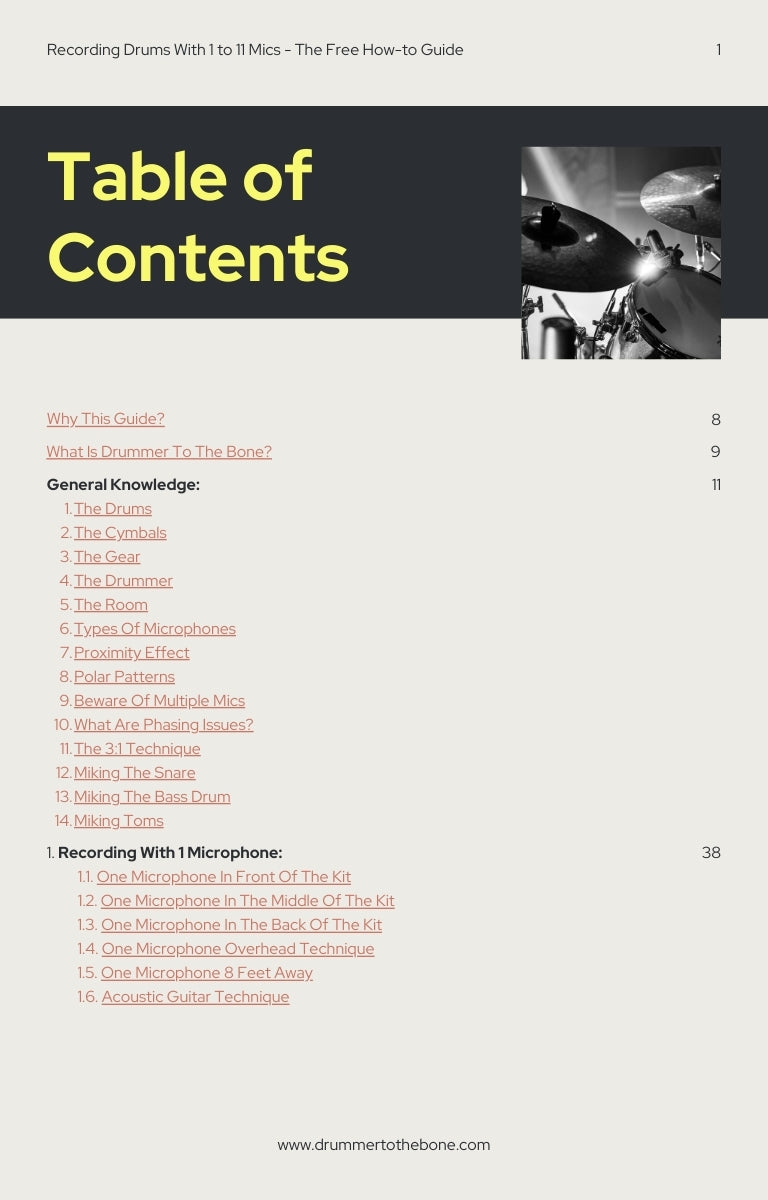
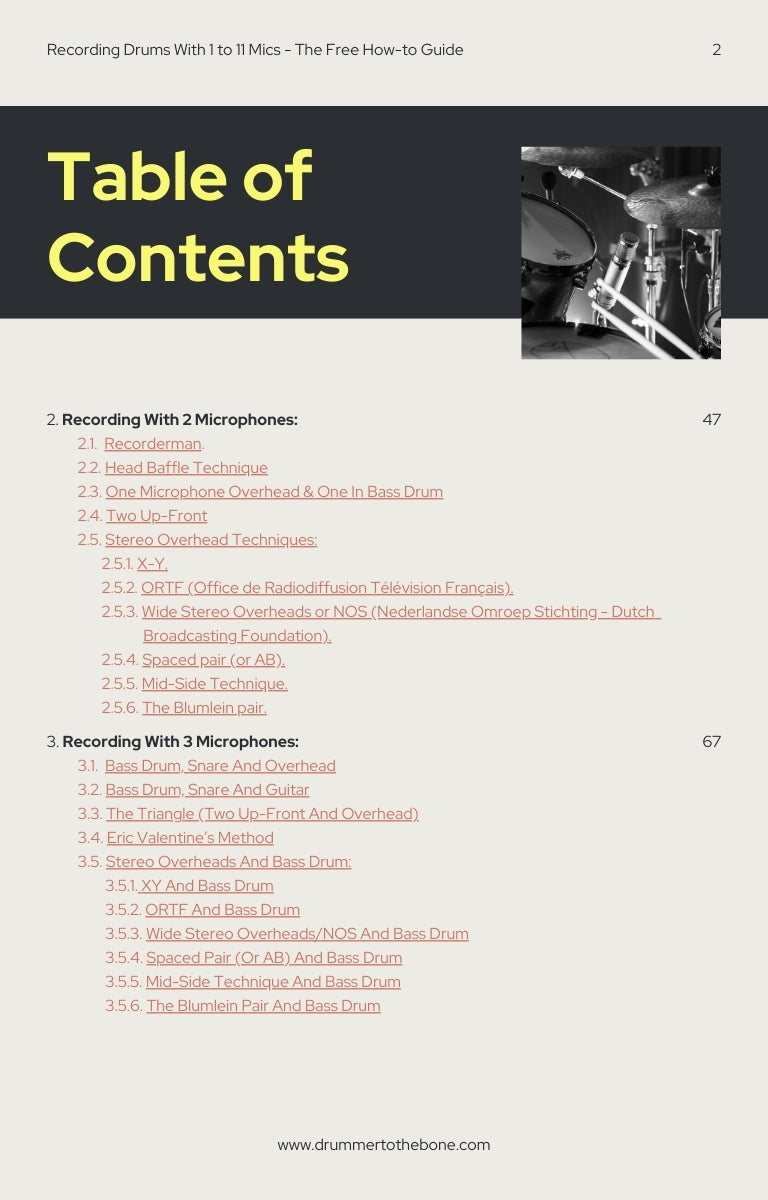
This section will be divided in 2:
- Techniques developed based on necessity (for lack of equipment) or looking for different approaches in sound. These ideas serve a purpose within a context. They might be useful to you in some situations, but not in others, and that’s OK. Try them out, see how they work for you.
- Classic stereo overhead techniques. In this subsection we’ll go into detail on how to set up the most common stereo overhead techniques. These techniques are the backbone of most drum miking approaches. We must cover them in order to move forward.
2.1. Recorderman
Story time:
This method was created in 2003 in a session for the band “Hazy Malaze." The engineer, Eric Greedy, pitched an idea to producer, Eric “Mixerman” Sarafin, that he wanted to try. This technique involved 4 microphones: 2 overheads, a snare mic and a bass drum mic. The trick of this technique is that the overheads are equidistant from both the snare and the bass drum. The logic behind this approach was that if the overheads were equidistant from both the snare and the kick, they would appear dead-center in the mix. So, since Eric Sarafin was “Mixerman”, Eric Greedy became “Recorderman."
Since the basis for this technique is the stereo overhead microphone placements, it can be used with 2 mics. And so, we are including it in this section, but just focusing on the stereo overheads. The results will not be the same as the “Hazy Malaze” record, but it has an interesting approach.
If you want the story from Eric Sarafin himself, you can check it out here.
In the original session, 2 Coles 4038 Ribbon Microphones were used as room mics. But you can use condensers, they should work just fine. Eric Sarafin has praised how balanced Dan Fadel, the drummer, was. Balanced drumming is the key.
Now, to the technique:

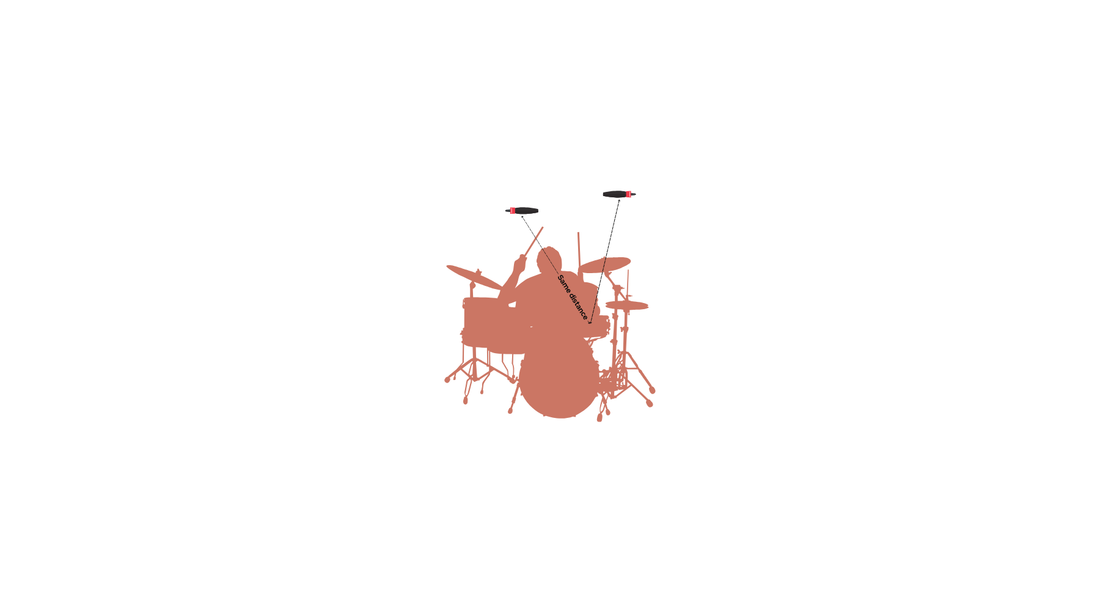
The mics have to be equidistant from the snare and the kick.
- Position the first mic about two drumsticks in height directly above the kit and pointed straight down at the snare.
- Position the second mic—which also has to be about two drumsticks from the snare—over the ride cymbal side, on the drummer’s shoulder, and also pointed at the snare.
- Next, measure the distance of the two mics from both the bass drum and the snare drum. Both mics should be equidistant from the snare and the bass drum, in order to avoid phase issues. Tricky, but it’s key.
-
To make sure both mics are equidistant from the bass drum and the snare, it’s easier to use a mic cable or a long string.
- Hold the cable end against the bass drum where the beater makes contact with the head.
- Pinch the cable at the length where it makes contact with the first mic. While holding this position, pinch the other end of the cable at the length it makes contact with the center of the top head of the snare drum.
- At this point the string or mic cable should be in a sort of triangle shape. Move the top point of the triangle – the part you have pinched – to each mic to verify they are both of equal distance from the bass drum and snare.

Front view.

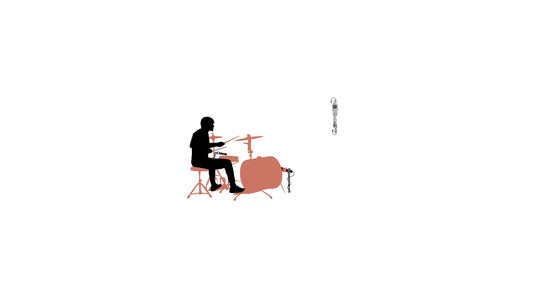
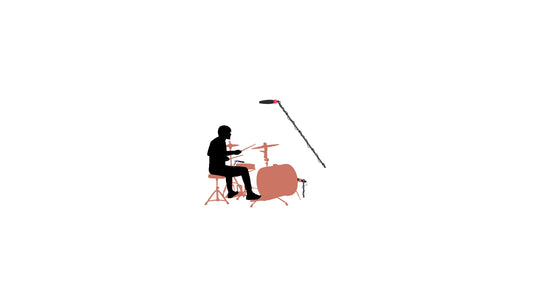
Side view. The Mic on the right tends to be a little further back than the right.
Got it? Great, now we’re ready to record.
Pros to this technique:
- If you get the measurements correctly (equidistant) you’ll find that the snare and bass drum are dead center. So, a lot of mono compatibility.
- A very clear sound approach, with little ambience. If you’re looking for a focused sound, it’s a great approach.
- Even though it sounds like a lot of work to set it up, once you nail it, it’s fairly simple to set up and get going.
- Adjusts very well to small room situations—because it was developed in a small room!
Cons:
- By itself, the 2-mic setup will not give you a very clear and potent bass drum. This is to be expected, these 2 mics are not pointing at the bass drum’s front or inside. That’s why Eric Sarafin is very adamant that this technique also uses bass drum and snare mics.
- Like the previous point, even though you’ll get a clearer snare (because of the mics aiming at it), you won’t get a lot of articulation from it. You will get it as part of a whole, but if you need more snare wires and brightness, you’ll want a snare mic.
- It’s easier to get phase problems. With so much measuring happening, you’ll have to be very thorough and keep your ears open.
2.2. Head Baffle Technique
This technique uses two cardioid condenser microphones positioned side-by-side with the drummer's ears and pointed toward the front of the kit. The microphones should be 4 to 8 inches from the drummer's head.

This technique is very straightforward and tries to emulate how you hear the drums when you’re playing them. As with the other techniques, phasing is key, so be mindful of the distance between each mic and the snare (should be equidistant).
Pros to this technique:
- The sound is very close to the way you hear your drums when playing, which can have very good applications—especially for demoing or “POV” type of approach.
- You get a good stereo sound, with the hi-hat pulling towards one side and the ride cymbal towards the other.
- Very easy to set up.
Cons:
- As with the “Recorderman” technique, you won’t have a lot of bass drum, or low-end for that matter. So it is advisable to use this approach with other mics (at least a bass drum mic).
- The drummer should move as little as possible and be careful not to breathe heavily.
- You won’t necessarily get a centered sound. On the contrary, with this approach it is better to pan each microphone hard (or mid-way) to each side.
2.3. One Microphone Overhead & One In Bass Drum
Disclaimer: this technique is suitable to record with only 2 mics.
For this technique you’ll need one cardioid condenser microphone as an overhead pointing down at the drum kit. The other microphone is a dynamic microphone (but if you have a condenser it will also work, just make sure you use the dB reduction pad to avoid distortion) and is placed inside the bass drum aimed at the head, or just outside the bass drum.

It’s a very straightforward approach, consider a few things when using this approach:
- Point the overhead towards the snare drum. You’ll want as much snare as possible to counter the bass drum mic.
- Beware of the balance. With the overhead picking up the majority of the kit, if you play your cymbals too loud, you’ll get a lot of noise and poor sound definition. Go easy on the open hi-hat and the crashes.
-
You have a potential phase issue here as well:
-
Since your bass drum mic will pick up your bass drum hit before the room condenser will, you might end up with a phase issue.
- Put the overhead condenser as close as possible to the drum set. A good rule of thumb is to start at 2 drumsticks in height, just like “Recorderman."
- Place the bass drum mic just outside, or outside the bass drum. If you place it outside the bass drum you might get a bit of ambience but it might blend better. If you put it inside the bass drum, you’ll get a clearer sound but, your potential for phasing is a bit higher.
-
Since your bass drum mic will pick up your bass drum hit before the room condenser will, you might end up with a phase issue.
- Play around with positioning until you get the sound you want. Sometimes, a little bit of “clap” might be what you want.
Pros of this technique:
- It was designed to be used with 2 mics, so it comes in handy in many situations (like rehearsal room or demoing situations).
- Easy to set up, easy to work with.
- Even if you have 2 condensers or 2 dynamic mics, you should be fine. It will do the job.
- It’s a great place to start experimenting with miking drums.
- Good enough tom sound.
- As long as you don’t have any phasing issues, you can put both mics dead center in the mix and you’re good to go.
Cons:
- It will only work in mono. Since both mics have their specific job, you need everything everywhere. So, even though this is a simple approach, if you’re looking for a big sound, it might not be your first choice.
2.4. Two Up-Front
Disclaimer: this technique is suitable to record with only 2 mics.
Author’s Note: this is my go-to setup when demoing drums.
For this technique, it’s preferred to have 2 identical condenser mics, placed at around 3 feet to the left and right of the bass drum, and try to have them at the same distance to each side. You can go further, but the further you go, the less definition you might get. You should create a triangle between each microphone and the center of your snare.

Author’s Note 2: with this approach, I never got a measuring tape or anything like that. I eyeballed the distance. The final decision was determined by my ears and not the measuring tape. The idea behind this setup is to be very quick to set up and go.
When using this approach:
- Condensers are highly recommended, since you’ll be capturing the entire drum set sound, room included.
- As you move the condensers closer to the drum set, remember to turn on the dB “pad” to avoid distortion, because you’ll most certainly overpower them.
- The reason why they’re in front, and not the back, is because both mics pick up the bass drum, so you’ll get a very decent amount of low end from this approach.
- Because both mics pick up the bass drum at more or less the same rate, the bass drum serves as a nice anchor, even if you pan both mics hard left and hard right, the bass drum will stay very close to the middle.
- Don’t place the mics too high. 2 to 3 feet should do the trick. You don’t want them too high, so you’ll miss the bass drum’s low-end, and you don’t want them too low, and be too far from your cymbals.
Pros of this approach:
- Very easy to set up.
- You can get a very good stereo image of the drums. If you pan left and hard right, you’ll get your hi-hat on one side, your ride cymbal on the other; but the bass drum in the center and snare pulling towards the closest mic (usually the one on the hi-hat side).
- Fairly good toms sound.
Cons:
- This approach is very sensitive to your balance. If you play too loud, especially the cymbals, things can get out of whack.
- The bass drum will sound a bit dry. Since the mics are to the side of the bass drum, you don’t get a direct sound projection from them, so the usual result is bass drums on the dryer side of the spectrum. When you sit at your DAW, you might need to boost the low-end a bit.
2.5. Stereo Overhead Techniques
The overheads are the unifying element in any drum sound. Don't think of them as cymbal mics, but more as "everything" mics. If placed correctly, the overheads will capture the entire drum kit.
Although most of these techniques were not created as stand-alone miking approaches, but developed to be a part of a whole, in this section we’ll focus on the 2 microphones that create each stereo approach.
Even if you plan to use a substantial amount of the close-mics in your drum mix, you still have to get the overhead placement right. In further sections we’ll start adding close-mics and build up multi-mic approaches.
Another key factor we must address: centering and avoiding phase issues. In order to avoid phasing issues, center your stereo overheads around the snare.
The mics should be equidistant from the snare. Some choose the middle point between the snare and bass drum to measure that center—which usually coincides with the center of the kit—which is absolutely valid. If you’re not sure, start with centering your overheads from your snare and then find what works for you.
2.5.1. X-Y
This technique uses two condenser microphones of the same type with cardioid polar patterns. The microphones are placed at a 90° angle from one another at about 3 feet from the snare, above the cymbals. The key is to align the two mic capsules on a single axis. The horizontal and vertical plane positioning should be the same for both microphone capsules and they should be close enough that they're nearly touching each other. That’s why this technique is also referred to as “Coincident Pair” because of this exact “nearly touching”.
You should start with a 90° angle between the capsules, but you can increase the width of the pair up to 135° if needed.

This technique tends to be the default miking technique for many engineers, and it does have a number of pros to it:
- You get a clear sound.
- Great mono compatibility. Since both mics are virtually at the same place, although picking opposite spectrums, the mix is exceptionally balanced. If you bounce the mix to mono in your DAW, you shouldn’t find signs of “out of phase." If you know your mix will be played on a single speaker, this would be a good choice.
- Easy setup.
- It usually produces the perfect sound for “supporting role." This technique is great when the drums aren’t really going to be the focal point. The balanced sound will serve you well.
Cons:
- If you want a spread, super-stereo drum sound, then this is not your choice.
2.5.2. ORTF
The Office de Radiodiffusion Télévision Français technique, developed at Radio France. The French Broadcasting Company developed this improvement (according to them, at least) of the X/Y method. Supposedly, they were looking to emulate the distance between our ears. They figured that the result might sound like what we hear naturally.
This technique is pretty much like the X-Y, in the sense that it uses 2 identical microphones, but at an angle of 110° and spaced apart at around 6.7″ (17cm)—which is approximately the distance between your ears.

Pros of this approach:
- Is a good way to get a wider image than X-Y, but without as much variation in ambience from left to right. You can get a more direct cymbal and overhead sound without losing some semblance of the stereo image of the kit.
- As with the X-Y (although a little less), it keeps very good mono compatibility.
- The stereo image you can capture using is well suited to headphone playback (because you’re using the same principle: one for each ear).
Cons:
- You have a slight chance of phase issues if you don’t center the pair correctly. The further away you go from X-Y, where the mics are together, the more careful you have to be with the centering.
- Although you get a wider stereo sound than X-Y, you still have a sound that sits on the narrower side of the spectrum. I wouldn’t rely on this method if you’re looking for a wide sound, but it is a good option for added room ambience sound.
2.5.3. Wide Stereo Overheads or NOS (Nederlandse Omroep Stichting—Dutch Broadcasting Foundation)
This technique is similar to ORTF, but with a few tweaks. It also requires the use of two identical condenser microphones placed 12 inches (30 cm) apart over the drum set and placed at a 90° angle pointed away from one another. The image below will help:

This approach will give you an even wider stereo image than ORTF, for some it’s “better” for others it’s the same. You’ll be the judge of that.
2.5.4. Spaced Pair (Or AB)
A very common method of overhead mic placement. Basically, you’ve got one mic for the left side, and one mic over the right.
This technique uses a pair of mics spaced apart to cover different areas of the drum kit. Try to use 2 identical microphones, although it is not absolutely necessary.
Each mic picks up one side of the kit so the center image is not usually strong and both sides of the kit often sound different. One way to avoid this is to ensure that the distance from the snare to each mic is exactly the same, and that the angle of the mic relative to the snare is the same as well.

Pros of this approach:
- A very wide stereo kit sound. The further the mics are apart, you’ll naturally get a wider sound and significantly different areas of the kit picked up.
- Very good option for more “in your face” drum sound—think hard rock/metal or other genres where you need pushing drums.
Cons:
-
As mentioned before, you’ll have to work to ensure mono compatibility (AKA: no phasing issues). Start by making sure the microphones are equidistant from the snare. You can move the reference point to the center of the kit—instead of the snare—if you want, but centering is very important.
- The easiest (and most reliable way) of confirming is by getting out a measuring tape. Put one end of the tape in the center of the snare drum, and stretch it out to both mics. If the distance is the same, you’re in business.
-
Make sure you’re getting a balanced sound when setting the distance from your kit. You’ll get a lot more cymbals with this method, so you might wanna go easier on those crashes.
- If you want clearer crashes (why wouldn't you want that?), point the mics to the cymbal edges, not the center (bell).
- But if you’re looking for a more overall sound, point the mic on your left at the snare. The right one between the bass drum and the floor tom.
- Your toms might be louder on one side and the snare and hi-hat louder on the other side. This is to be expected; it’s how you hear them with your ears! If you don’t like that type of sound, then this approach might not be what you’re looking for.
- The higher above the drum kit you go, the more room sound you’ll get. More room = less definition.
2.5.5. Mid-Side Technique
This is a stereo technique that predicates on using two different kinds of mics.
- A directional mic (cardioid) pointing at the drum set.
- A bi-directional (or figure-eight) mic facing the sides.
The capsules must be vertically aligned to maintain an accurate and phase-coherent image. Because you are breaking up the stereo sound into two, it is not necessary for the two mics to sound the same.
So basically, 2 mics:
- The first one is a front-facing mic (cardioid), placed in front of the drums (at around 4 feet or further) pointing straight at the drum set.
- The second one is either directly on top or below the previous one, at a 90° angle, with a figure-eight (or bi-directional) configuration (captures both sides), which means it’s capturing the sound perpendicular to the drums. Ambience. Room. Call it as you will.


Pros of this approach:
- You get a clear sound (from the front-facing mic) and ambience from the side-facing mic with only 2 mics and very little phase issues.
- You get 3 channels out of 2 mics: given that the figure-eight (bi-directional) mic’s signal can be split to 2 (one for each side), you can get a stereo sound, while having a very clear sound reference from the front-facing mic—which only makes sense in 1 channel, since it’s mono.
- You can get a very good overall sound of the drums. Don't go too high or you’ll miss the low-frequencies. A little higher than the kit’s height is OK.
Cons:
- You have to reverse the polarity on one of the channels of the figure-eight sides (channels). The difference is that what enters the front of the mic is in-phase and what enters the back of the mic is out-of-phase, so you have to take care of that.
- The side channels tend to sound a bit hollow when you listen to them individually. Usually it only makes sense when you add the front-facing mic.
- The side channels tend to pick up a lot of ambience, so be mindful of the room you’re in and take necessary measures to not have overtones and harmonics flying all over the place.
2.5.6. The Blumlein Pair
This technique uses the same set up as an X-Y but with ribbon microphones, typically angled at 90°. The back lobe of the bidirectional microphones captures room reverberation and offers a sense of depth that the X-Y setup cannot provide, while offering a clear sense of direction and a stable sense center of image.
Don’t go too high towards the ceiling, since reflections from the ceiling into the rear of the mic will cause phase-cancellation problems.

As with the X-Y, mono compatibility is excellent, but the lack of phase can make it sound tight—so, not a big stereo spread. Having said that, many engineers use this technique to get a “roomy” sound without compromising potential phase issues. For this place a Blumlein pair in front of the drum kit, positioned anywhere from 4 feet up to 25 feet away from the kit, depending on how much room tone they’re looking for.
Pros of this approach:
- Given that you’re using ribbon mics, the accuracy and capability of these mics to pick up the room is great.
- Super versatile technique, since you can put it in front of the kit, a few feet from it, to pick up ambience in every direction.
- Great complimentary room mic technique to the others.
- Easy to set up.
Cons:
- Ribbon mics are expensive. No way around that.
- Ribbon mics tend to be more sensitive than other mics, so handle them with care.
- Positioning and room are key. The better the room, the better it will sound. On the contrary, bad room, not-so-good sound.

