Recording drums with 1 microphone is a tricky business. You need to capture the entire sound of the drum set with a single microphone. There’s no way around it. And it won’t be easy to get a good & balanced sound if you don’t mix yourself first. What does that mean? Be mindful of the intensity with which you play each instrument.
The more balanced you play, the less microphones you need to capture a brilliant take.
You play rock? Then snare and bass drum are the main thing, then the hi-hat and ride; you don’t want your hi-hat overpowering the rest of your sound. You’re playing jazz? Then the ride cymbal is where it’s at, then the hi-hat pedal, then bass drum and snare.
The techniques below are very handy for demoing and easily recording ideas, but also can be added to the more complex microphone arranging techniques to add color or ambience to your sound.
Speaking of ambience, it’s time to dive into overhead mic angles.
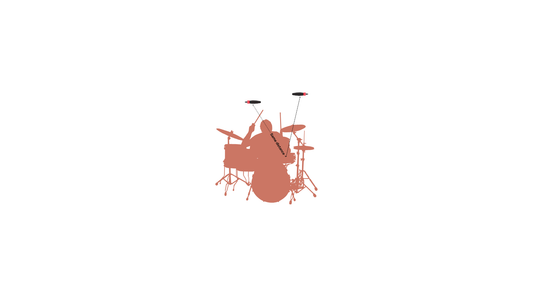
Adjusting an overhead microphone angle is another tool to get your balance right. You should keep the front of the mic on-axis with the kit (pointing towards it) as you move them forward or backwards. What you want to be “on-axis” depends on what you choose as the focal point for your microphone.
The balance changes as you move the mic from front to back:
- When your overhead is over the drum set, moving the mic toward the front of the kit will push it closer to the cymbals and rack toms.
- Pulling it back will pull it closer to the snare, floor tom, and hi-hat.
These adjustments move the drums and cymbals in and out of the mics’ polar patterns (the area where the mic captures sounds), so pay attention to how the tone and balance changes when you move your microphone.
As a rule of thumb, with an overhead room mic, start at the top and start going back while you’re looking for the sound you want. The further back you go, you’ll tend to capture more drums and less cymbals.
To maintain proper orientation of the mic, you should adjust it as if it was mounted on a track that moves in an arc above the drum kit, to the front and the back.
![GRAPH TRACK OF ARC BEHIND THE KIT]](https://cdn.shopify.com/s/files/1/0770/8770/3345/files/GRAPH_TRACK_OF_ARC_BEHIND_THE_KIT_1024x1024.jpg?v=1727906797)
Single Microphone Techniques
1.1. One Microphone In Front Of The Kit
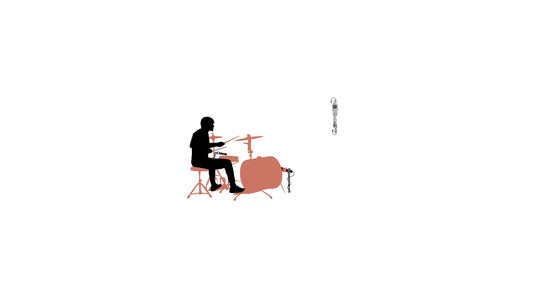
Place one cardioid condenser microphone 4 feet above the floor and around 1 feet in front of the kit, microphone facing the kit.

Pros to this technique:
- It doesn’t get any simpler than this.
- You’ll get a very decent holistic sound of the drums, with a sound boost of the cymbals, especially crash cymbals.
Cons:
- You might get a dry bass drum, given that it is a bit far away from it and not placed where the bass drum’s sound projection is.
- If you’re out of balance, especially if you’re laying too hard on your cymbals, sound definition and clarity will not come out.
1.2. One Microphone In The Middle Of The Kit
Place one condenser mic above the bass drum, between the rack toms. The idea behind this technique is to get the condenser as close to every element of the drum set as possible.
You might get more snare than bass drum (given that the snare projects the sound closer to where the mic is, while the bass drum projects the sound mainly from the front, so it’s moving away from the mic).
Given the position of the mic, the result is a much dryer sound, with little room sound.

Pros to this technique:
- Easy to set up.
- A lot of drum sounds in the mix, thumpy bass drum.
- Hi-hat further away than snare, which may help with the sound mix.
- Good all around sound, drums closer and cymbals further away to the microphone.
Cons:
- If you’re playing the snare too hard, the sound balance might be off. Be mindful of how you approach your drumming.
- The bass drum tends to be more clicky and thumpy, with less bottom end.
1.3. One Microphone In The Back Of The Kit
Place a condenser microphone pointed at the back of the kit directly over the drummer's head.
This technique intends to capture the drummer’s POV sound—in mono, of course, since it’s one mic.

Pros to this technique:
- Pretty straightforward: just place a mic on top of your head.
- If you like what you hear when you play, then this approach will be in the direction of what you hear. Of course, better microphone, better sound capturing.
- If your drums sing and you’re balanced, this approach will sing too.
Cons:
- As when you play, if you’re too loud on your cymbals, your ears suffer. This technique will too. Balance is key.
- The bass drum might sound dry and away, since it is the furthest away from the microphone.
1.4. One Microphone Overhead Technique
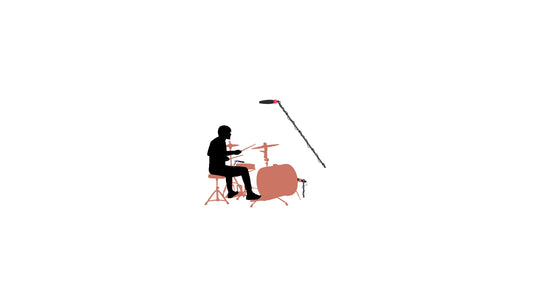
Place one cardioid condenser microphone as an overhead pointed down at the drums from a distance of about 4ft. Try to place it in the middle of the kit, so you have a balanced sound capture.
When using this technique, go easy on the cymbals. If you go too hard on them, especially the crashes, it will sound out-of-balance.

Pros to this technique:
- Once you find the right height for you, set it and forget it.
- Great approach to find out how to best set up an overhead mic and work with it to adjust your drumming balance.
Cons:
- As a stand-alone technique, this one can be tricky. Given the mic position, lots of cymbals and a good rack tom presence is characteristic of this approach. Use with caution.
- Dry, thumpy and lower on the mix bass drum, given its distance to the mic.
1.5. One Microphone 8 Feet Away
Place a condenser microphone placed around 8 feet away, pointed at the drums. Placing it in front of the bass drum is a good place to start. You can move it around from there, depending on the sound you’re looking for.

Pros to this technique:
- Great approach to get a holistic sound of the drum set with some room sound.
- If you have a good drum room, this approach will serve you well.
- Great for capturing ideas and recording the vibe of the drums + room.
- Great for playing around and listening to how different places in the room sound.
Cons:
- Floor toms are usually not well-represented with this approach. In general terms, low end sources that are behind high-end sources—like cymbals—tend to not be well heard in the mix.
- Rack toms might sound a bit dry.
- There’s a trade off: the closer and lower to the ground, the more low-end (especially bass drum) you’ll get; the further and higher, the more high-end you’ll capture.
1.6. Acoustic Guitar Technique
Place an acoustic guitar on a stand around 2 feet in front of your drum set. Preferably with the guitar’s opening looking away from the drums. Place a condenser microphone pointing at the guitar's opening. The sound of the drums will reverberate inside the guitar resonance box and be picked up by the condenser. A lot of reverb, maybe some echo. You might love it, you might hate it. That’s OK. It’s a fun experiment.
This is a strange idea, no doubt about it. Want to hear how it sounds? Check out this video.

Pros to this technique:
- You can achieve a very big room sound with easy to find elements (you can always get or borrow a cheap acoustic guitar and try it out).
- It’s a great way to start experimenting with sounds and adding tools to your sound arsenal. Who knows? Maybe you find a sound you were looking for.
Cons:
- Given the roomy and reverberating sound, it’s not advisable for busy drumming.
- It’s experimental. It won’t serve every situation.


